A workflow can explain itself. Add a plain-language note to any step, and AWFlow shows it as a sticky note on the canvas and reads all the notes back as a numbered story. This makes a flow someone shared with you legible the moment you open it — you learn it by reading, not by studying.
Add a note to a step
Section titled “Add a note to a step”Step 1:Right-click the step
On the canvas, right-click the step you want to explain.
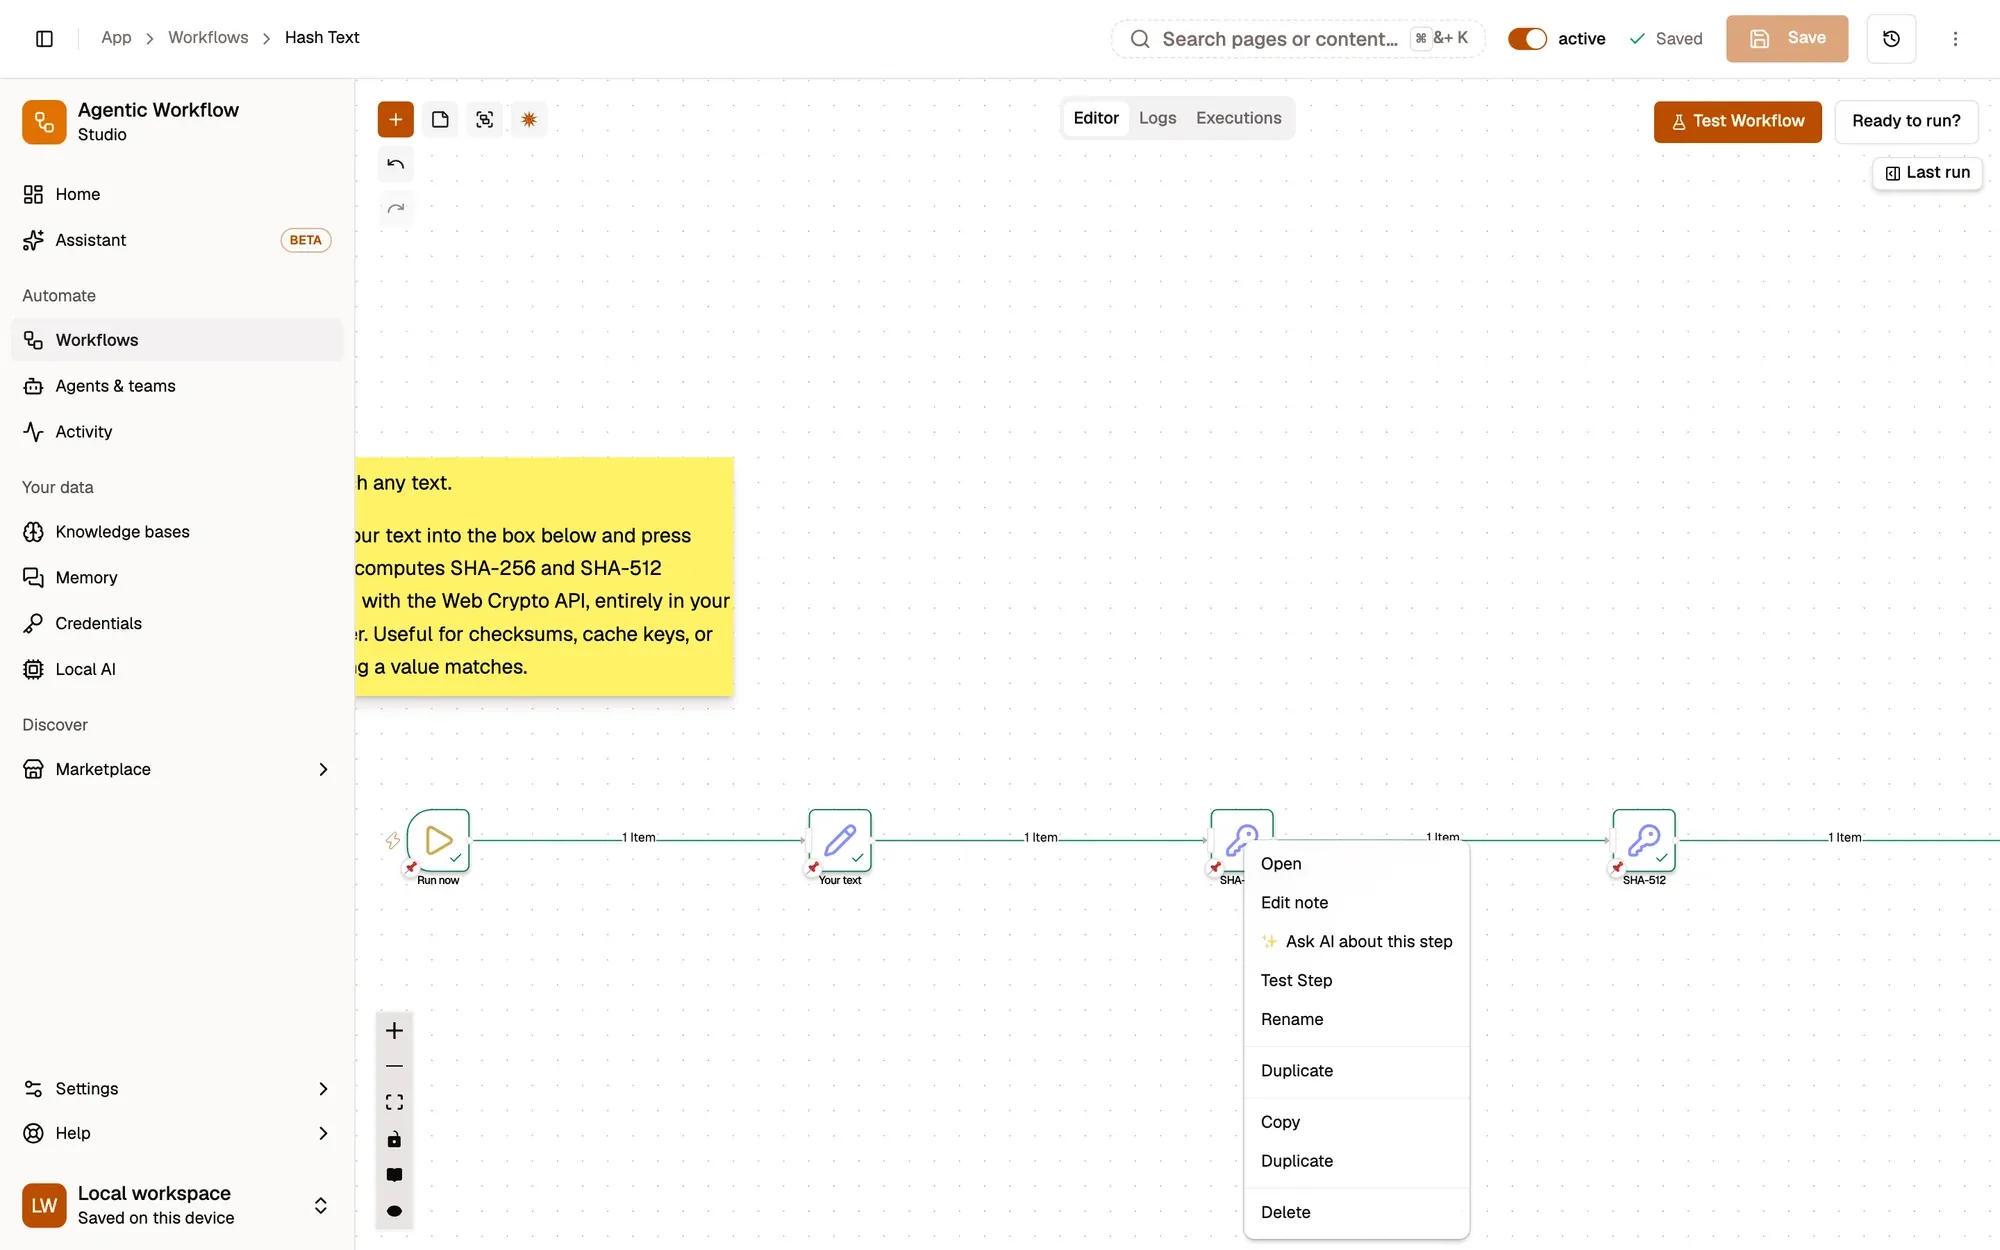
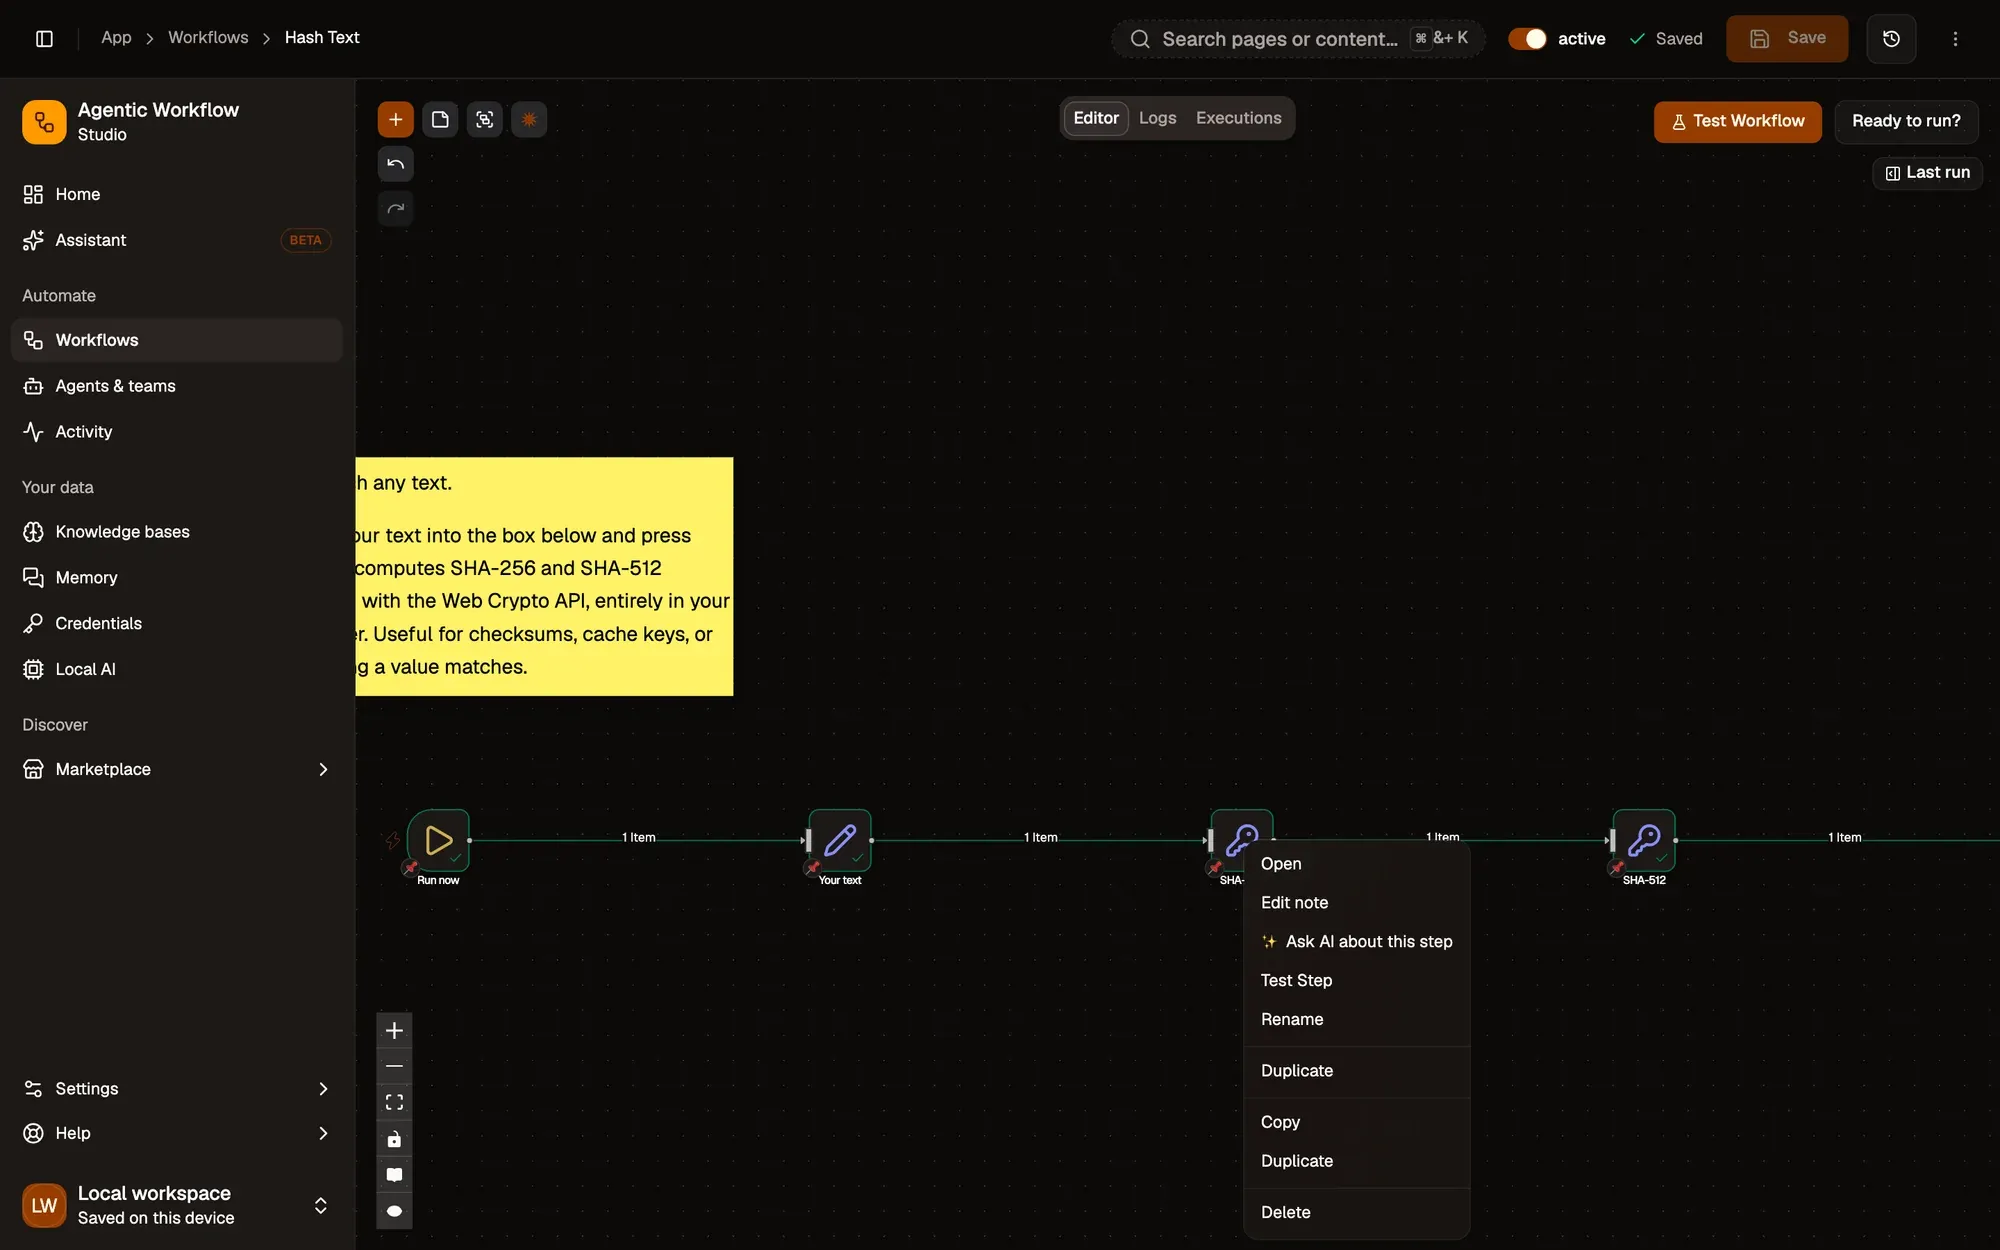
Step 2:Click Annotate this step
It reads Edit note when the step already has one.
Step 3:Write the note and click Save note
The Explain this step dialog opens. Write what the step does in plain words, or click ✨ Draft with AI for a first draft, then click Save note.
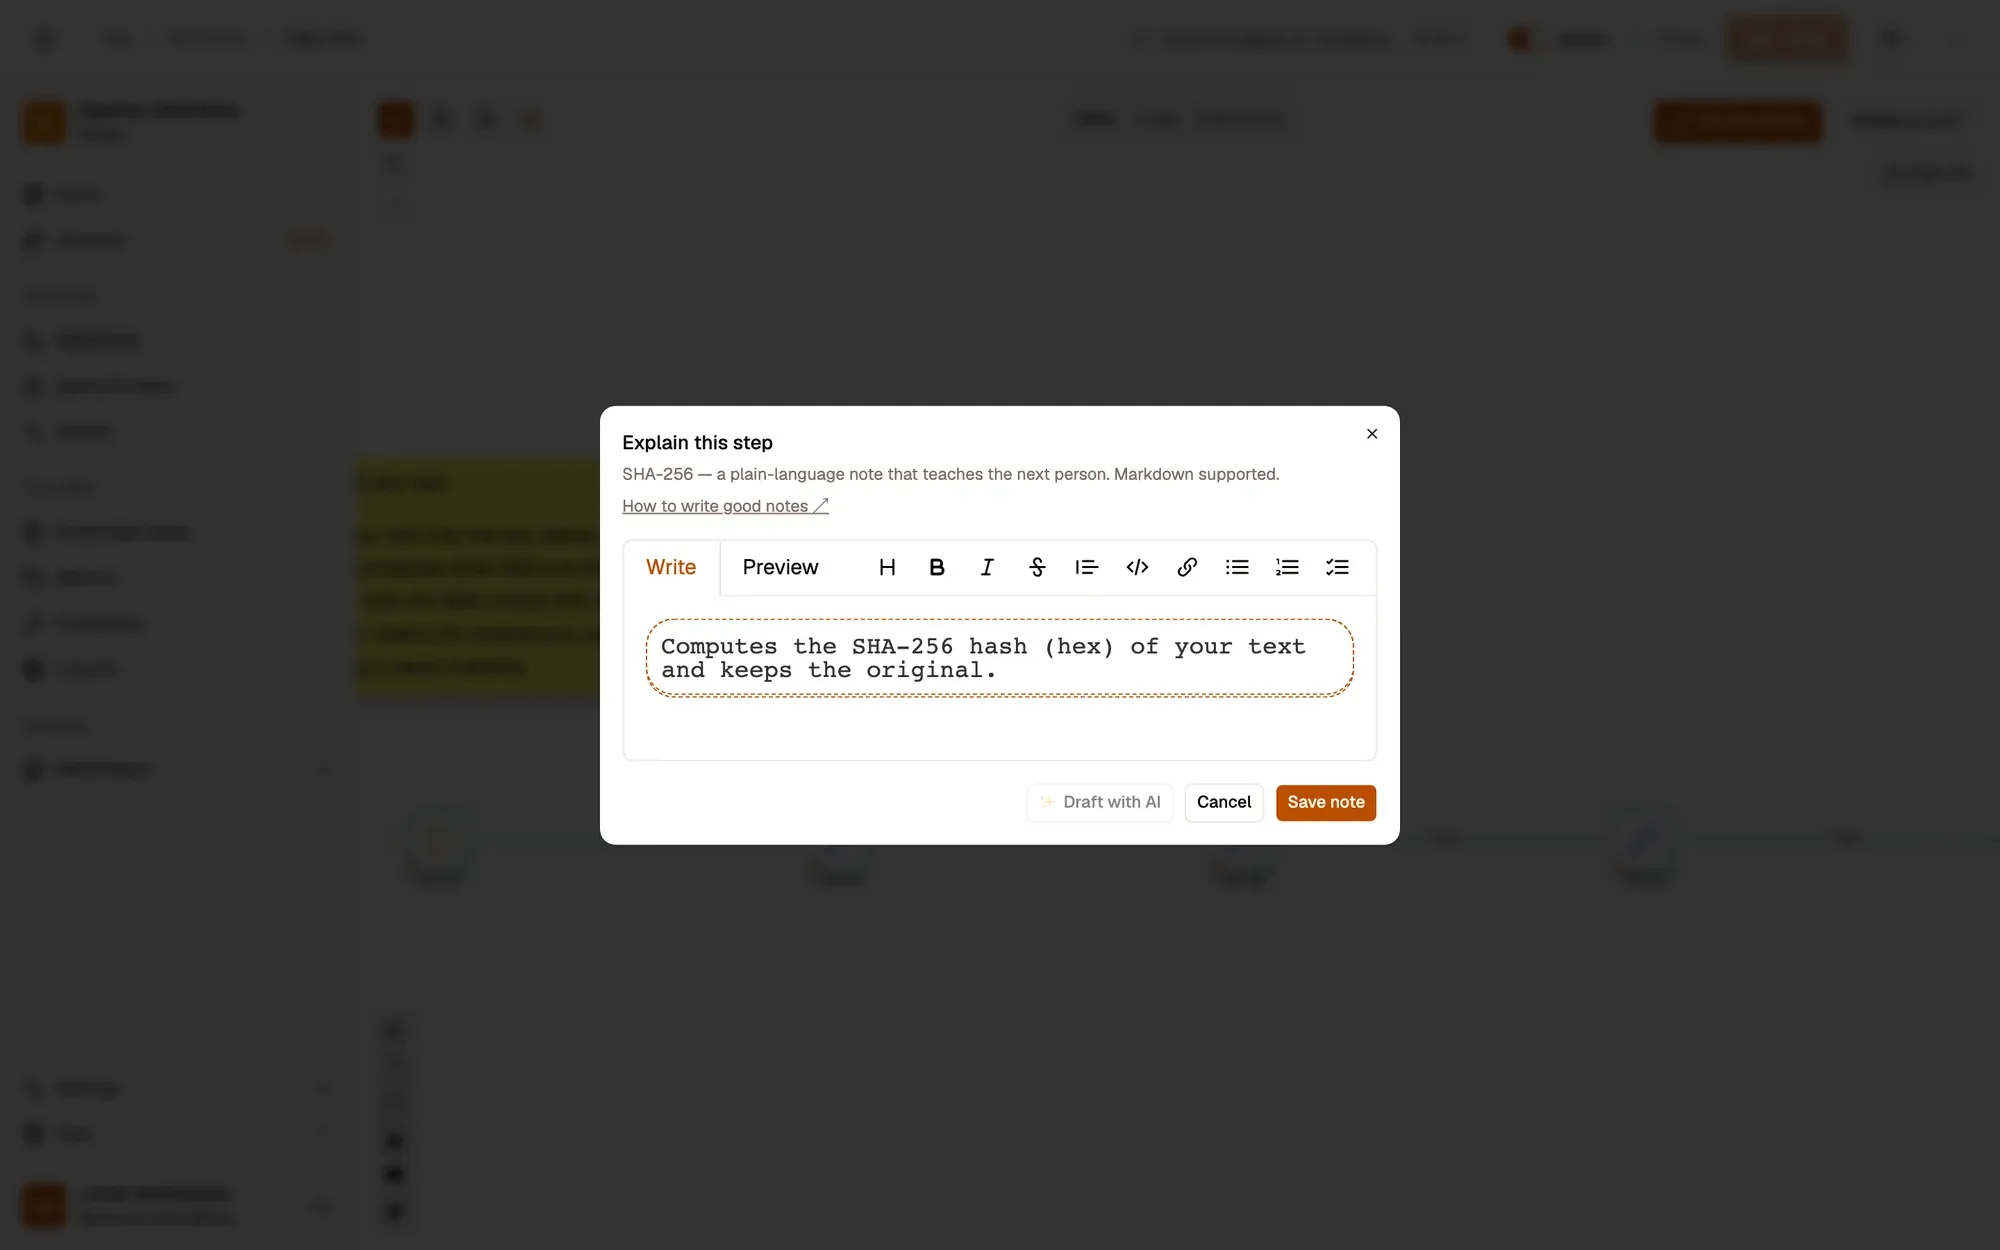
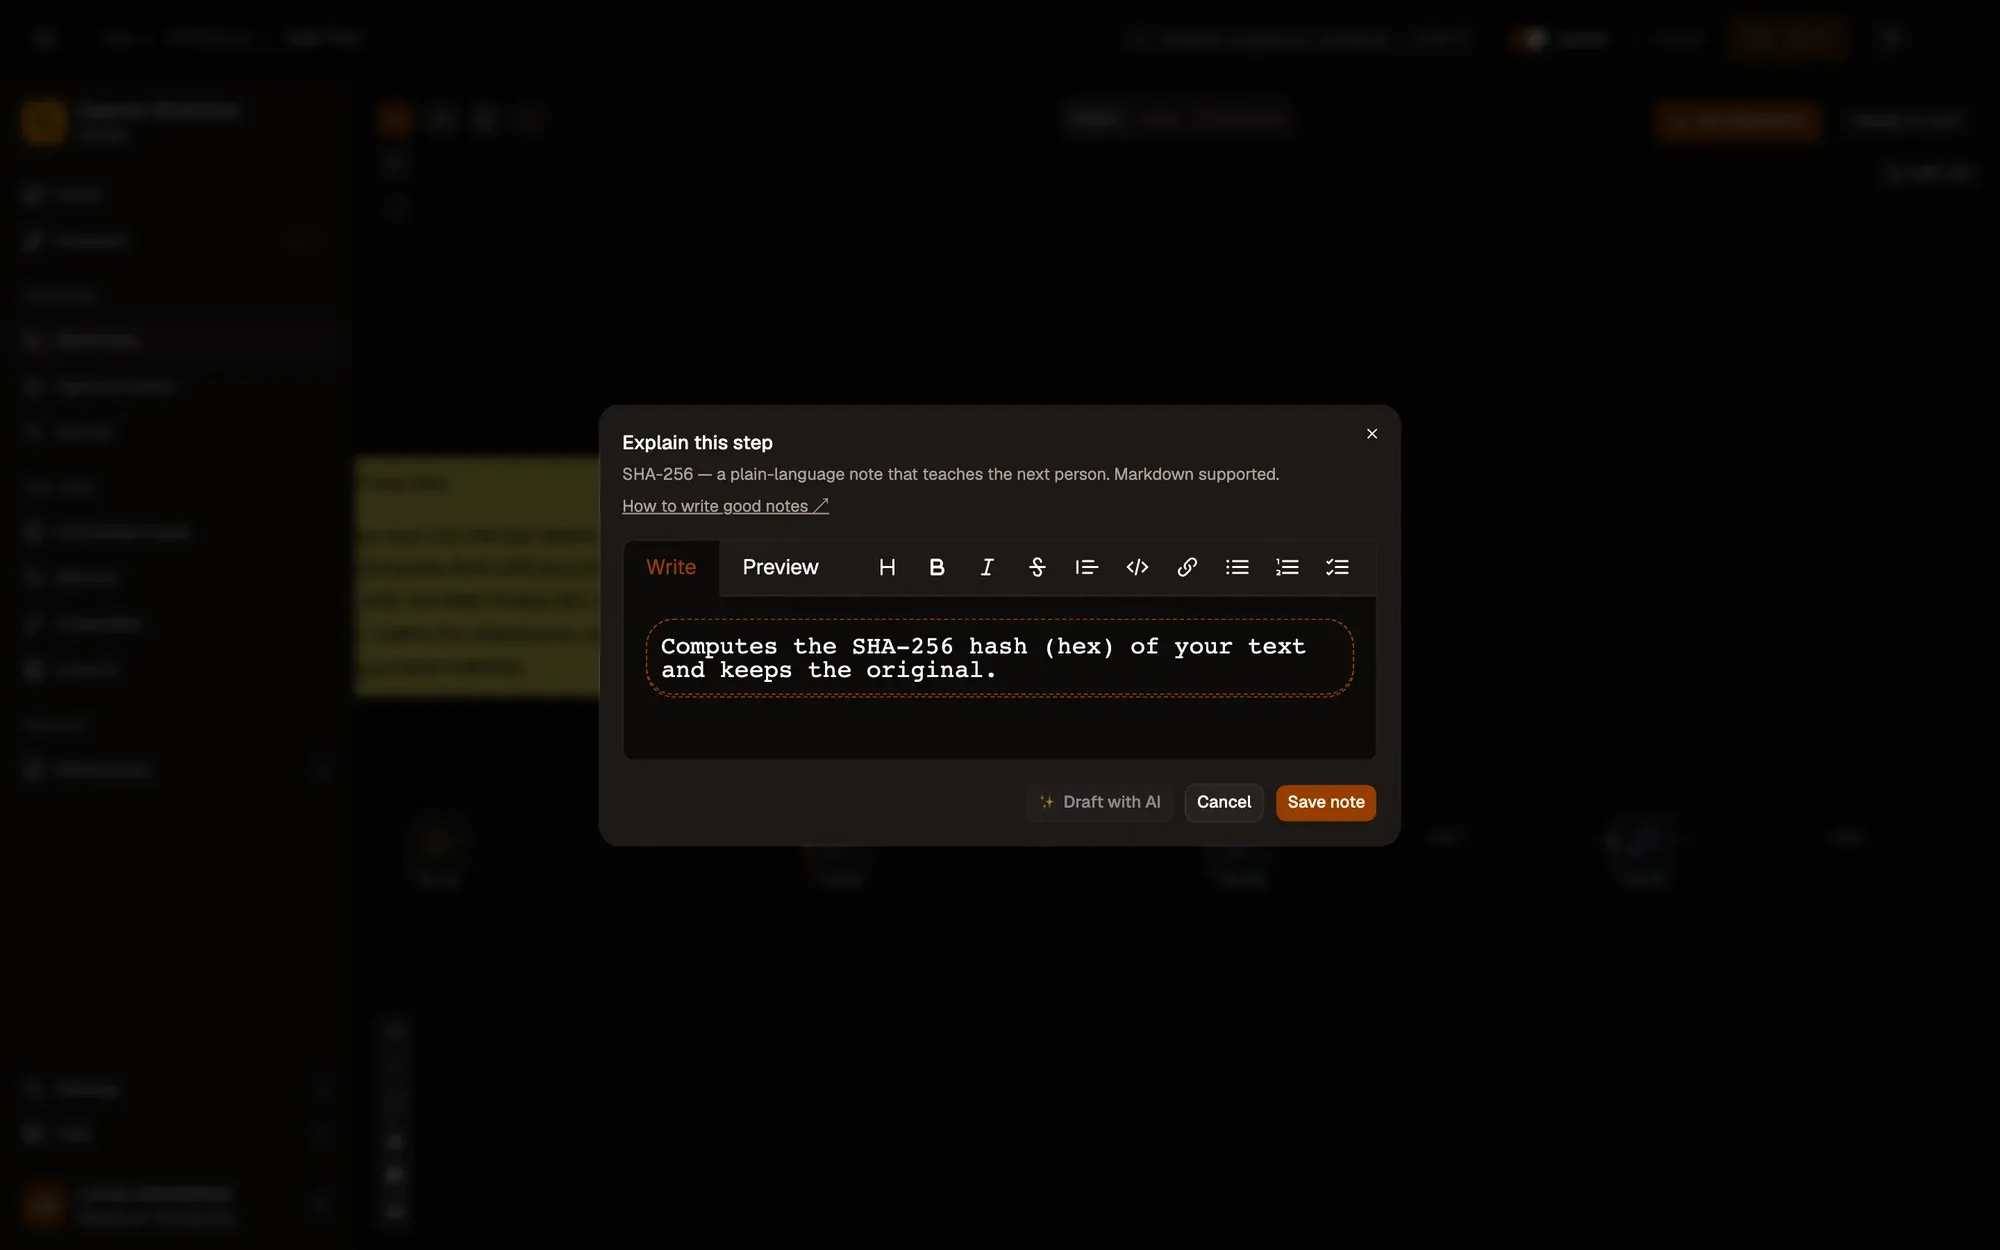
Check: the note shows under the step on the canvas and in the story.
The same dialog opens from the Explain this step button that shows above a step when you hover it, and from the Notes field in the Settings tab of the step’s settings.
Notes support markdown, so you can use bold, lists, and links to explain what a step does and why.
A note is meant for humans — say what the step accomplishes in plain words (“Grabs the product price from the page”), not how it’s configured.
See the notes on the canvas
Section titled “See the notes on the canvas”Every step that has a note shows a sticky-note callout attached beneath it. Steps without a note stay clean — there’s no clutter for un-annotated nodes. Click the ✎ on a callout to edit that note.
Read the flow as a story
Section titled “Read the flow as a story”Open How this flow works, the Story tab of the panel on the right of the canvas:
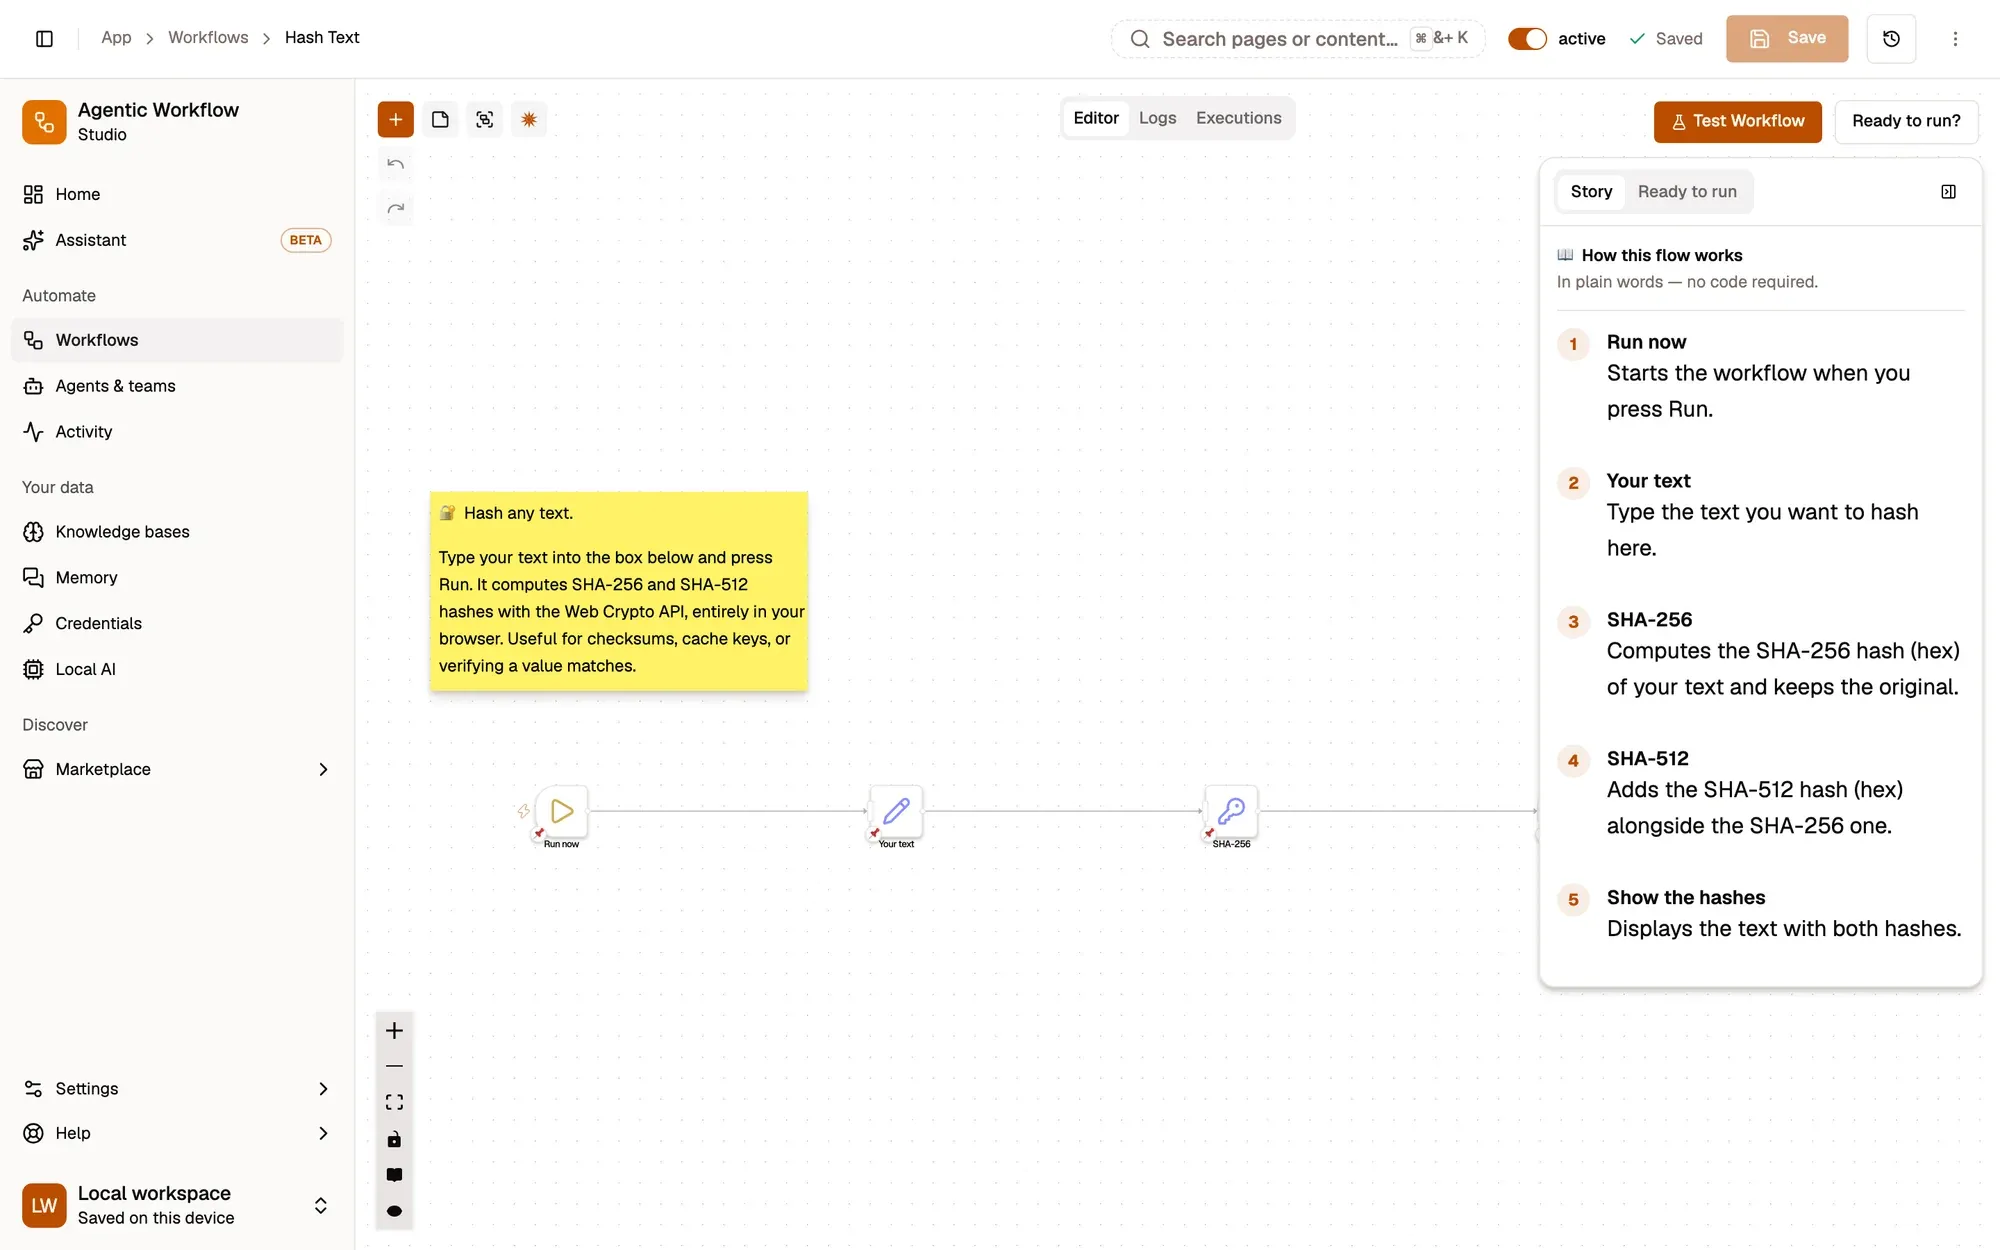
Numbered areas in the screenshot: 1. How this flow works; 2. Story tab; 3. Each step, numbered, with its note.
When you open a template, a downloaded flow, or any flow that already has notes, the story panel opens automatically — so a flow someone sent you reads like a walkthrough right away. You can reopen it any time with the book button, including when you’re only viewing a flow you can’t edit.
Let AI draft your notes
Section titled “Let AI draft your notes”If you’d rather not start from a blank note, the assistant can draft one for you in plain outcome-language — you stay in control and edit or approve what it writes.
- One step: in the Explain this step dialog, click ✨ Draft with AI. It reads the step and fills the editor with a suggested note; edit it, then Save note.
- The whole flow: open How this flow works and click ✨ Draft missing notes. A review window drafts a note for every step that doesn’t have one yet, filling them in as it goes. For each one you can Accept, tweak the text first, or Skip — or Accept all at once.
Nothing is written to your flow until you accept it. The drafts describe what each step accomplishes, not how it’s configured, and your step settings (like keys or tokens) are never sent along.
Setting up AI: drafting uses whichever AI provider you’ve configured for the assistant (or a local model). If you haven’t set one up yet, the ✨ buttons stay disabled with a hint — add a provider in the assistant setup to enable them.